> ## Documentation Index
> Fetch the complete documentation index at: https://alexcode.ai/docs/llms.txt
> Use this file to discover all available pages before exploring further.
# Team Configuration
> Manage team members and configure custom models for your organization
Set up AI models and manage your team through the Alex Sidebar Admin Portal at [https://www.alexcodes.app/admin](https://www.alexcodes.app/admin).
You'll need to be on a team subscription and have admin access to use these features.
## Access Team Settings
1. Go to [Alex Sidebar Admin Portal](https://www.alexcodes.app/admin)
2. Sign in with your admin account
3. Navigate to your team dashboard
## Team Management
### Managing Team Members
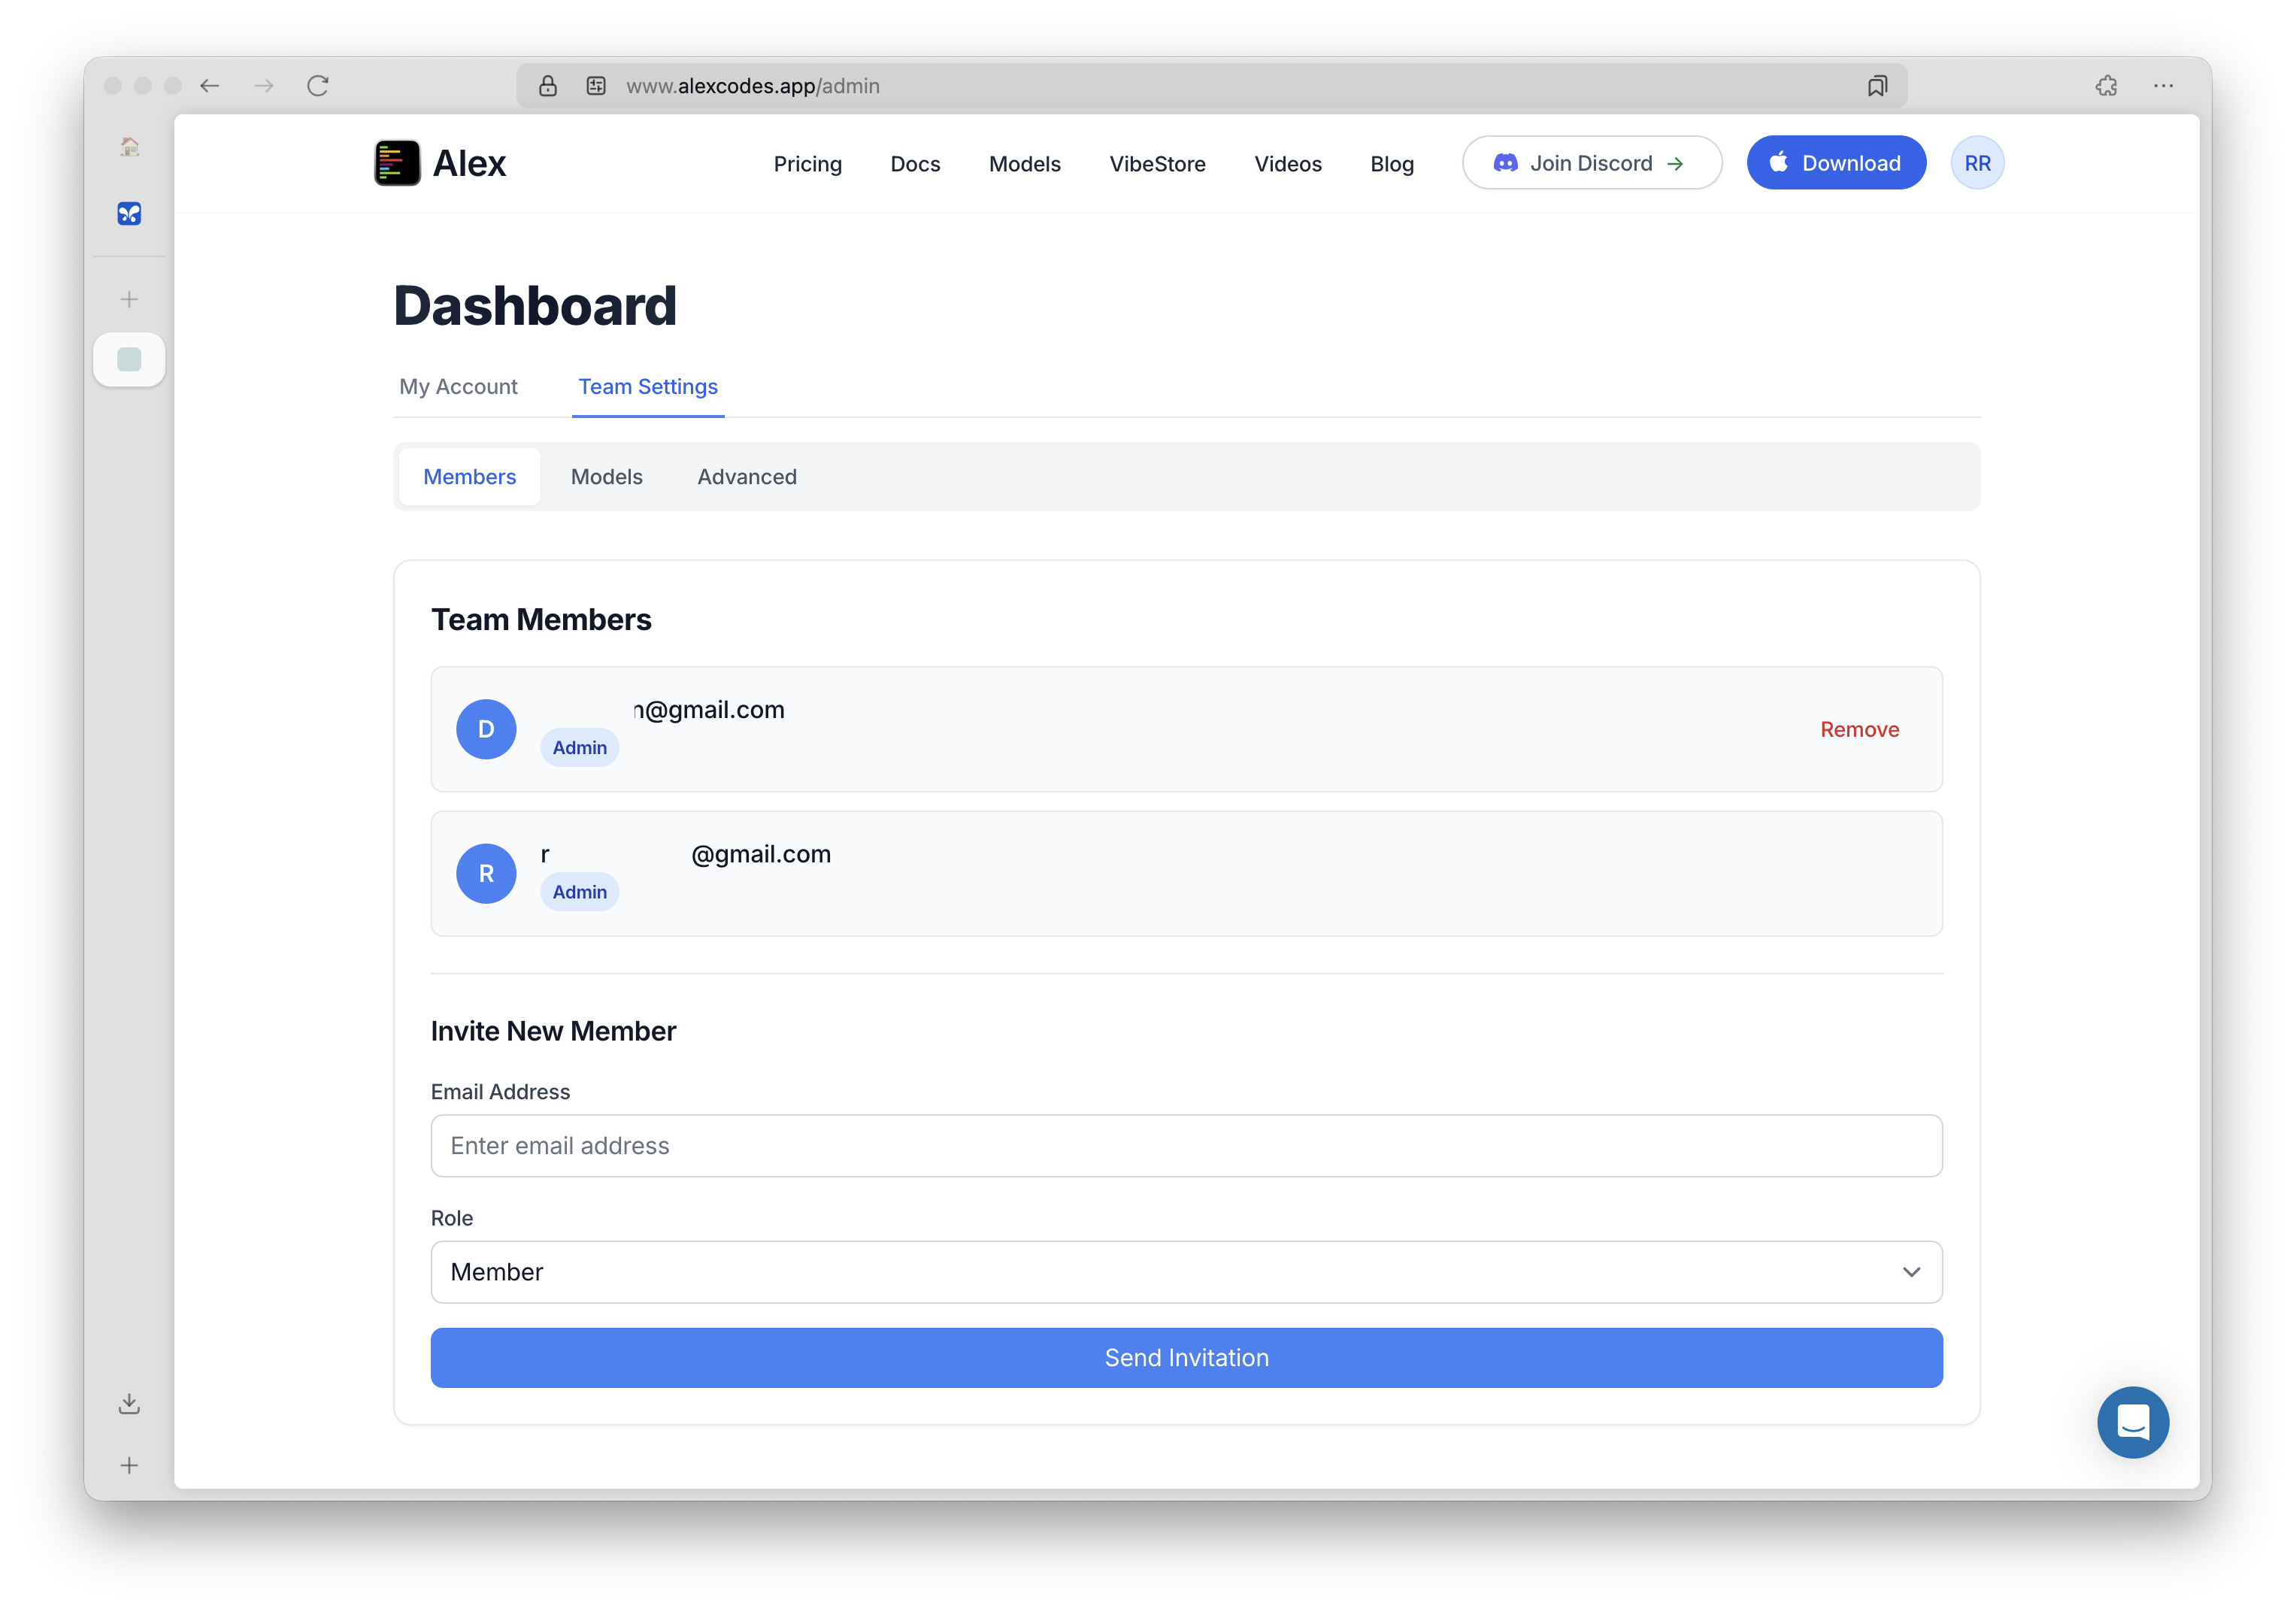 From the **Members** tab, you can:
See all team members with their roles (Admin/Member)
1. Enter the email address
2. Select their role (Member or Admin)
3. Click "Send Invitation"
Click "Remove" next to any member to revoke their access
Team members automatically inherit all model configurations set by admins. Individual API keys are not needed when using team models.
## Models Configuration
From the **Members** tab, you can:
See all team members with their roles (Admin/Member)
1. Enter the email address
2. Select their role (Member or Admin)
3. Click "Send Invitation"
Click "Remove" next to any member to revoke their access
Team members automatically inherit all model configurations set by admins. Individual API keys are not needed when using team models.
## Models Configuration
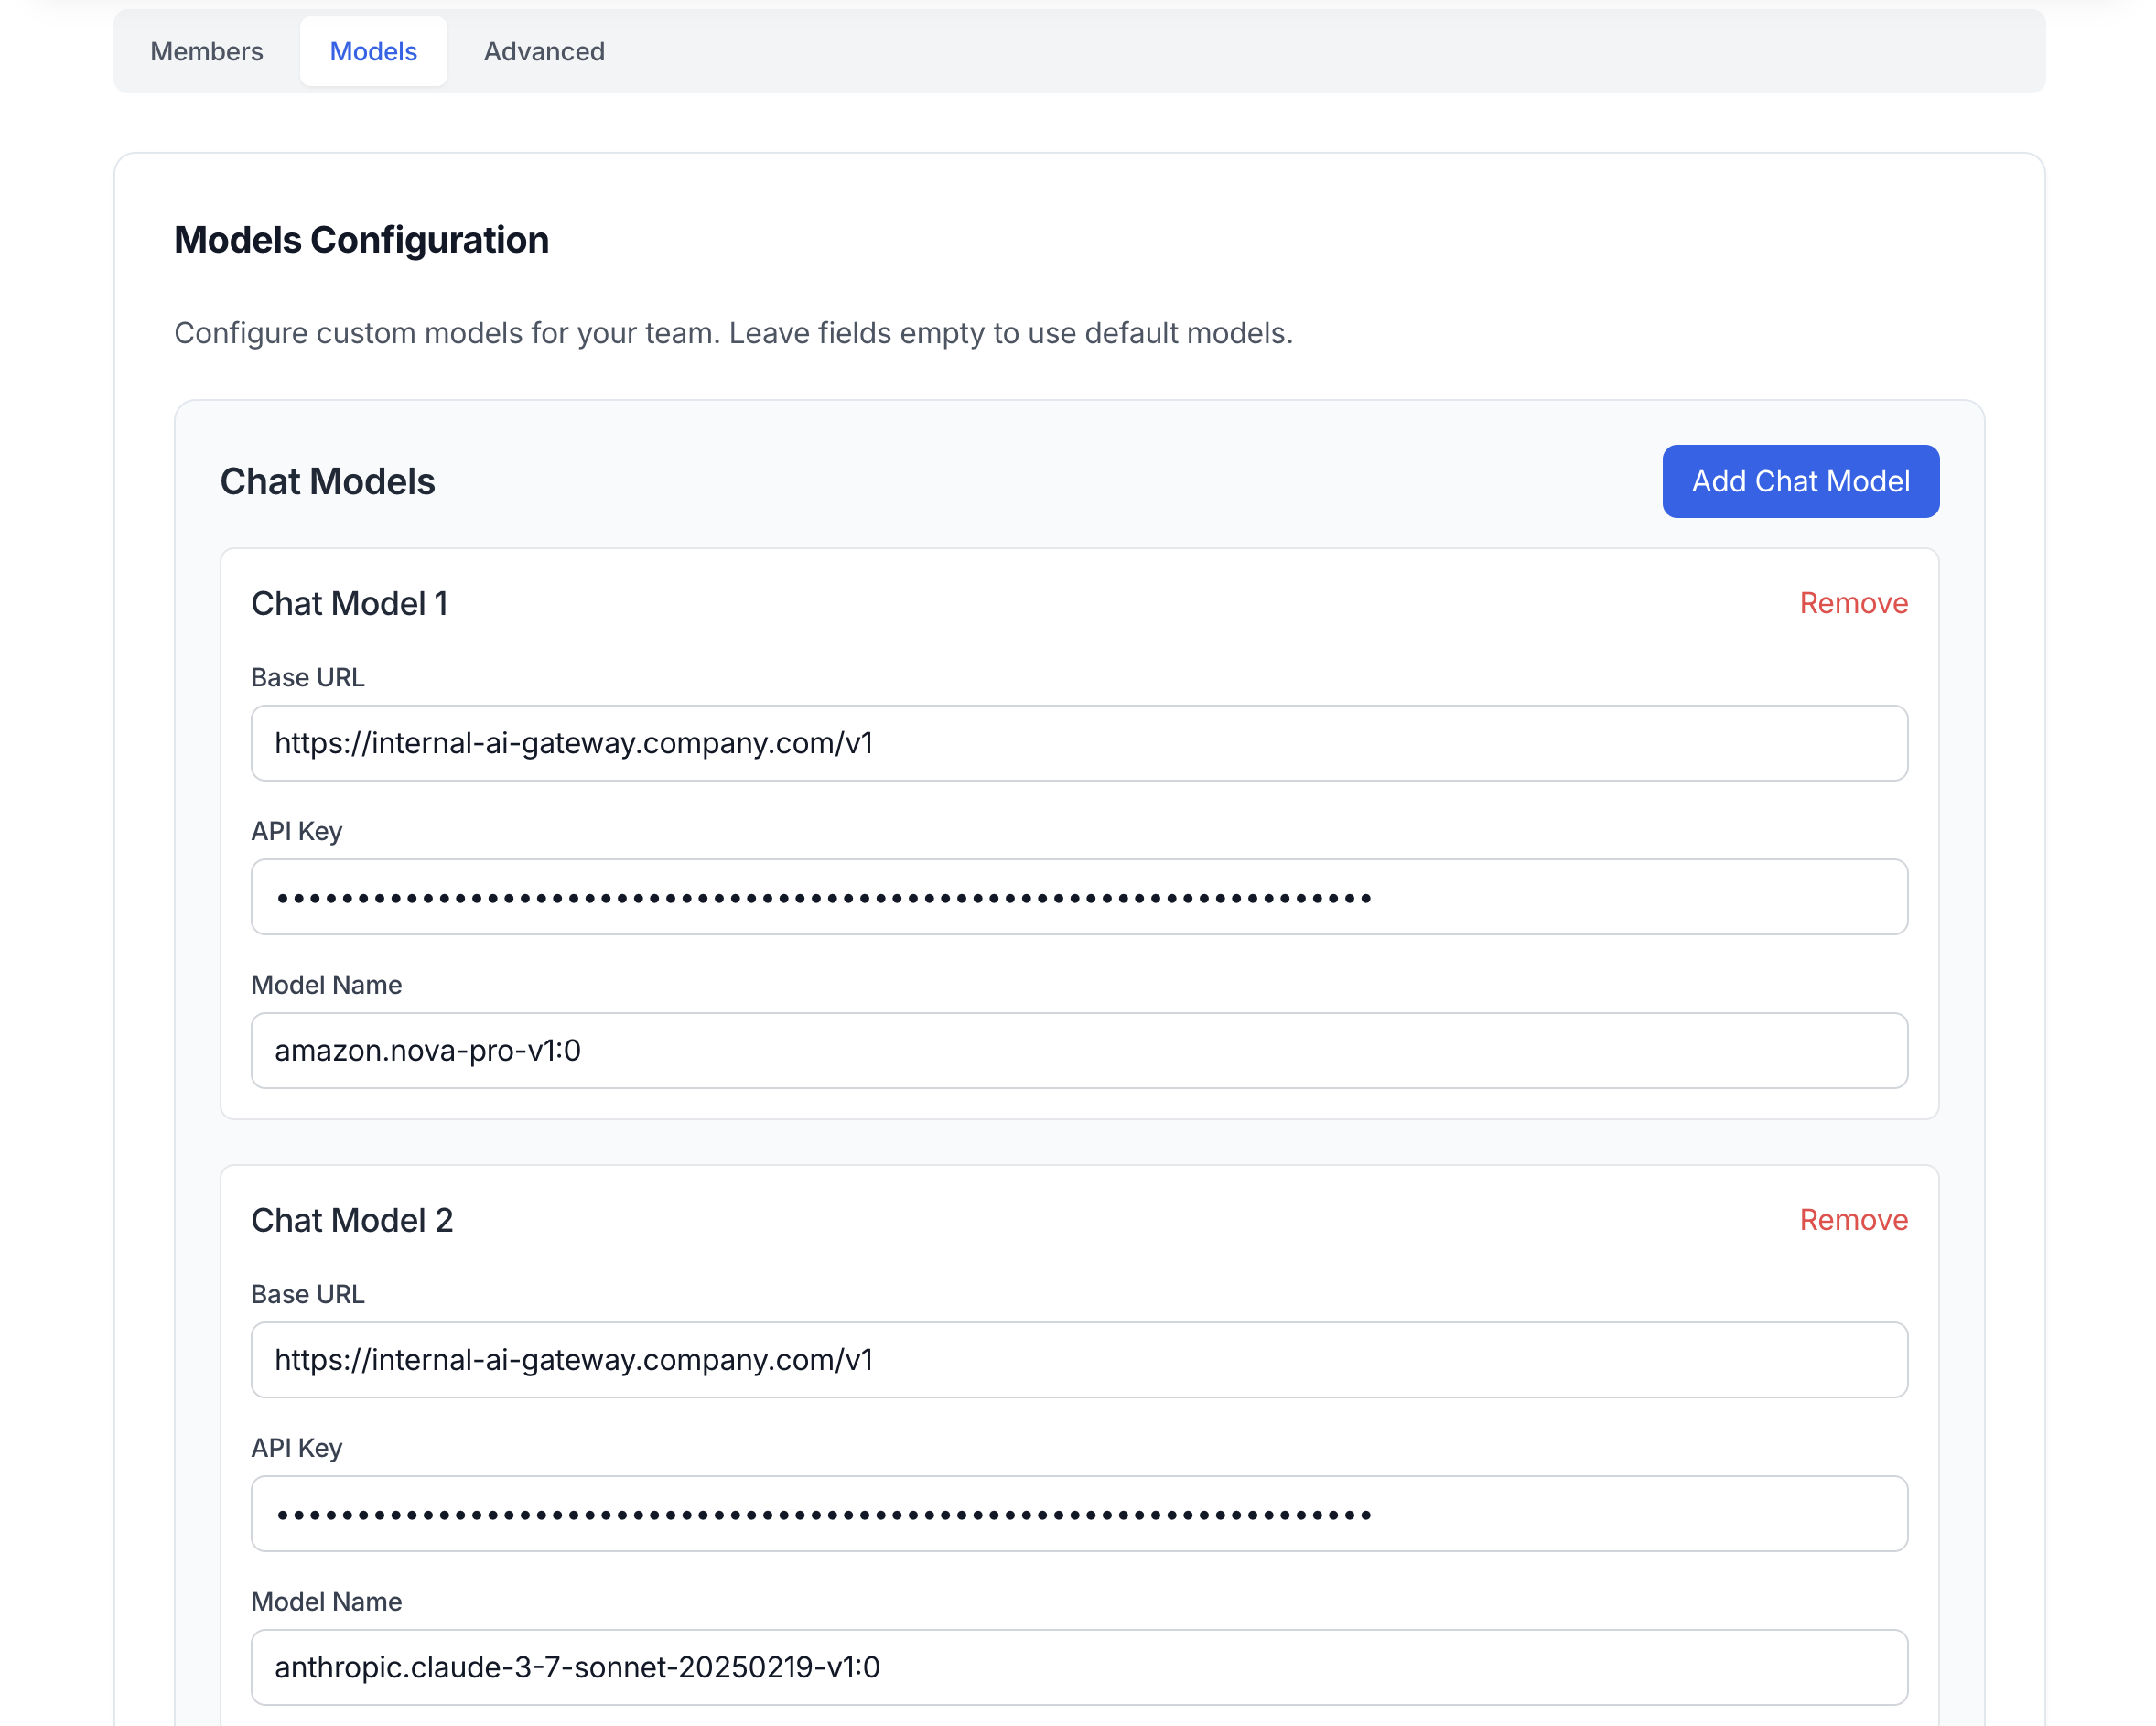 The **Models** tab lets you configure custom endpoints for all AI features in Alex Sidebar. Leave fields empty to use default models.
Remember to click the "Save Changes" button at the bottom right after configuring your models. Changes won't take effect until saved.
### Available Model Types
Other fields are optional. Alex Sidebar will use the default if you leave them empty.
1. **Chat Models** - These are the large language models for code generation and conversation in Alex Sidebar. Examples are Claude Sonnet 4, Gemini 2.5 Pro and OpenAI o3 model.
2. **Autocomplete Model** - Tab completion while you type. Fast models like Codestral work best here.
3. **Thinking Model** - Models like Gemini 2.5 Pro takes more time to reason on the given prompt and context to come to an answer.
4. **Voice Model** - Handles voice-to-text if you use voice input.
5. **Embedding Model** - Powers codebase search and indexing.
6. **Code-Apply Model** - Specialized for applying code edits.
7. **Web Model** - Used when searching the web.
8. **Image Model** - Analyzes screenshots and generates diagrams. Needs vision capabilities like GPT-4V or Claude.
9. **Summarizer Model** - Condenses long content.
The **Models** tab lets you configure custom endpoints for all AI features in Alex Sidebar. Leave fields empty to use default models.
Remember to click the "Save Changes" button at the bottom right after configuring your models. Changes won't take effect until saved.
### Available Model Types
Other fields are optional. Alex Sidebar will use the default if you leave them empty.
1. **Chat Models** - These are the large language models for code generation and conversation in Alex Sidebar. Examples are Claude Sonnet 4, Gemini 2.5 Pro and OpenAI o3 model.
2. **Autocomplete Model** - Tab completion while you type. Fast models like Codestral work best here.
3. **Thinking Model** - Models like Gemini 2.5 Pro takes more time to reason on the given prompt and context to come to an answer.
4. **Voice Model** - Handles voice-to-text if you use voice input.
5. **Embedding Model** - Powers codebase search and indexing.
6. **Code-Apply Model** - Specialized for applying code edits.
7. **Web Model** - Used when searching the web.
8. **Image Model** - Analyzes screenshots and generates diagrams. Needs vision capabilities like GPT-4V or Claude.
9. **Summarizer Model** - Condenses long content.
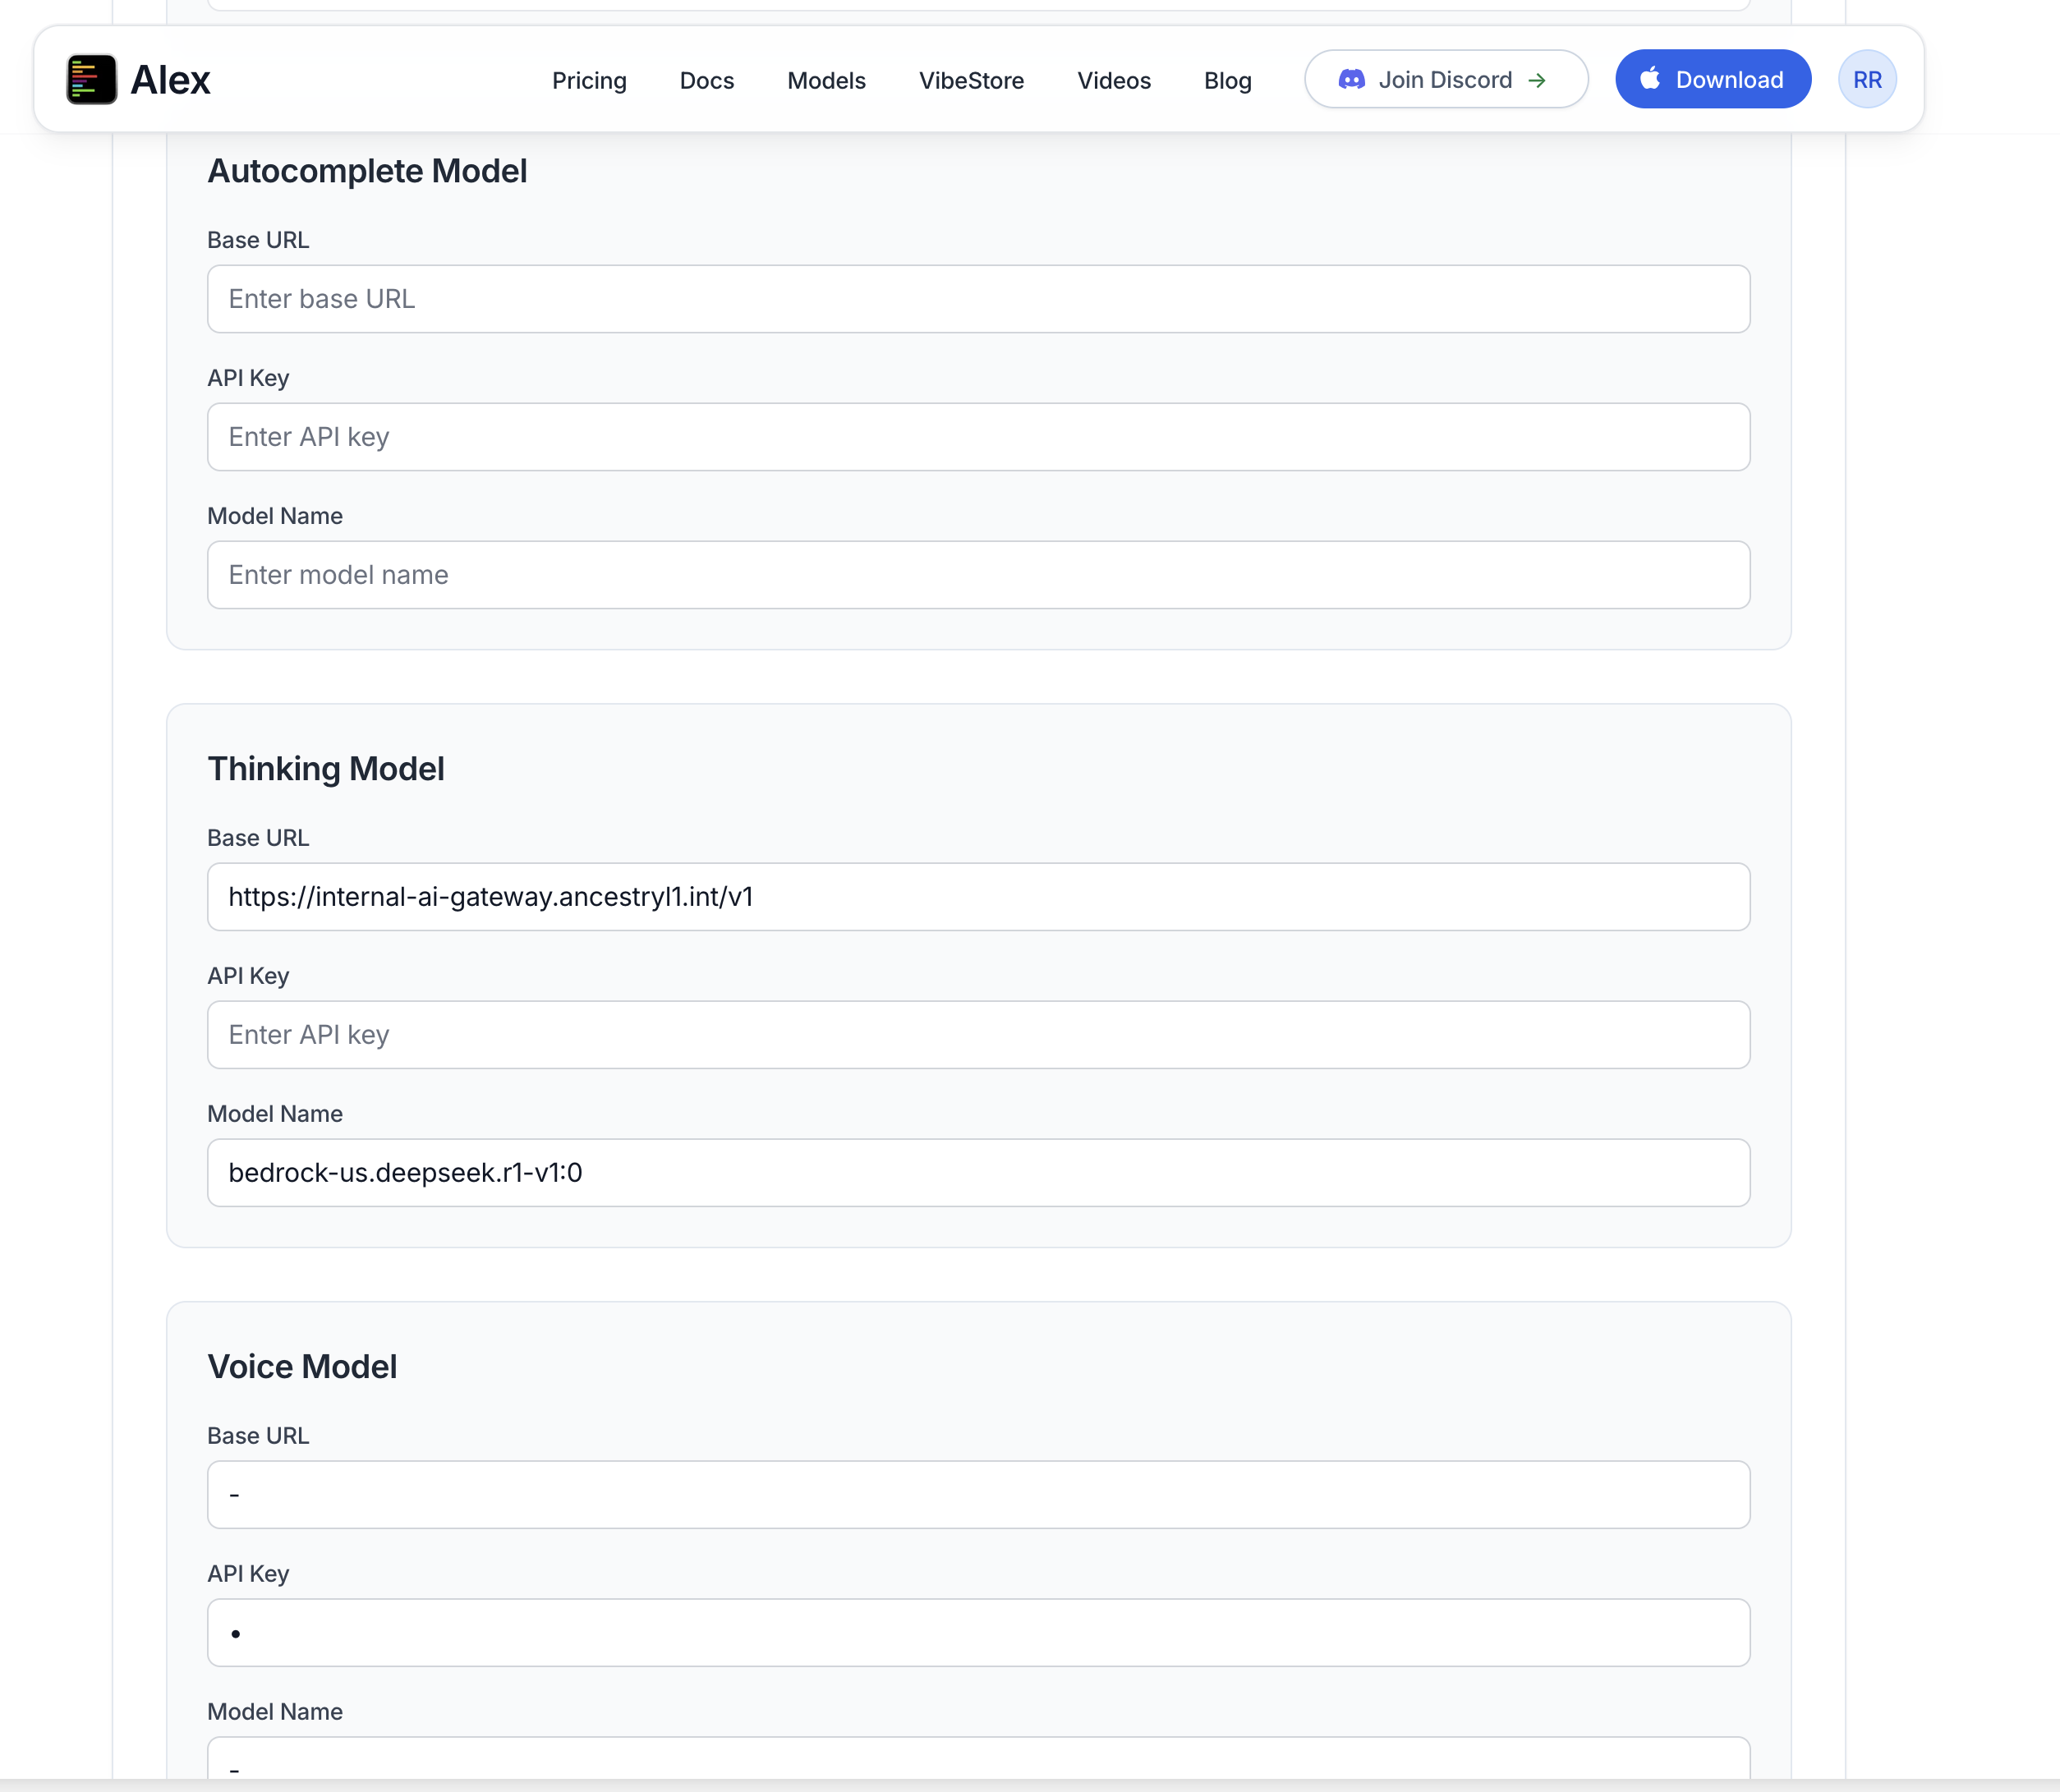 ### Adding Custom Models
For each model type, configure:
Enter your model endpoint URL (e.g., `https://internal-ai-gateway.company.com/v1`)
Enter the authentication key for your endpoint
Enter the exact model identifier (e.g., `amazon.nova-pro-v1.0`)
### Example Configurations
```yaml theme={null}
Base URL: https://your-litellm-proxy.com/v1
API Key: your-litellm-key
Model Name: amazon.nova-pro-v1.0
```
```yaml theme={null}
Base URL: https://your-resource.openai.azure.com/v1
API Key: your-azure-key
Model Name: gpt-4-deployment-name
```
```yaml theme={null}
Base URL: https://internal-llm.company.com/v1
API Key: internal-api-key
Model Name: llama-3-70b
```
### Multiple Chat Models
You can add multiple chat models for different use cases:
Add different models (Claude, GPT-4, Gemini) and let developers choose based on their needs
Configure separate models for development, staging, and production environments
### Using Team Models in Alex Sidebar
After configuring and saving your team models, they automatically appear in Alex Sidebar for all team members.
### Adding Custom Models
For each model type, configure:
Enter your model endpoint URL (e.g., `https://internal-ai-gateway.company.com/v1`)
Enter the authentication key for your endpoint
Enter the exact model identifier (e.g., `amazon.nova-pro-v1.0`)
### Example Configurations
```yaml theme={null}
Base URL: https://your-litellm-proxy.com/v1
API Key: your-litellm-key
Model Name: amazon.nova-pro-v1.0
```
```yaml theme={null}
Base URL: https://your-resource.openai.azure.com/v1
API Key: your-azure-key
Model Name: gpt-4-deployment-name
```
```yaml theme={null}
Base URL: https://internal-llm.company.com/v1
API Key: internal-api-key
Model Name: llama-3-70b
```
### Multiple Chat Models
You can add multiple chat models for different use cases:
Add different models (Claude, GPT-4, Gemini) and let developers choose based on their needs
Configure separate models for development, staging, and production environments
### Using Team Models in Alex Sidebar
After configuring and saving your team models, they automatically appear in Alex Sidebar for all team members.
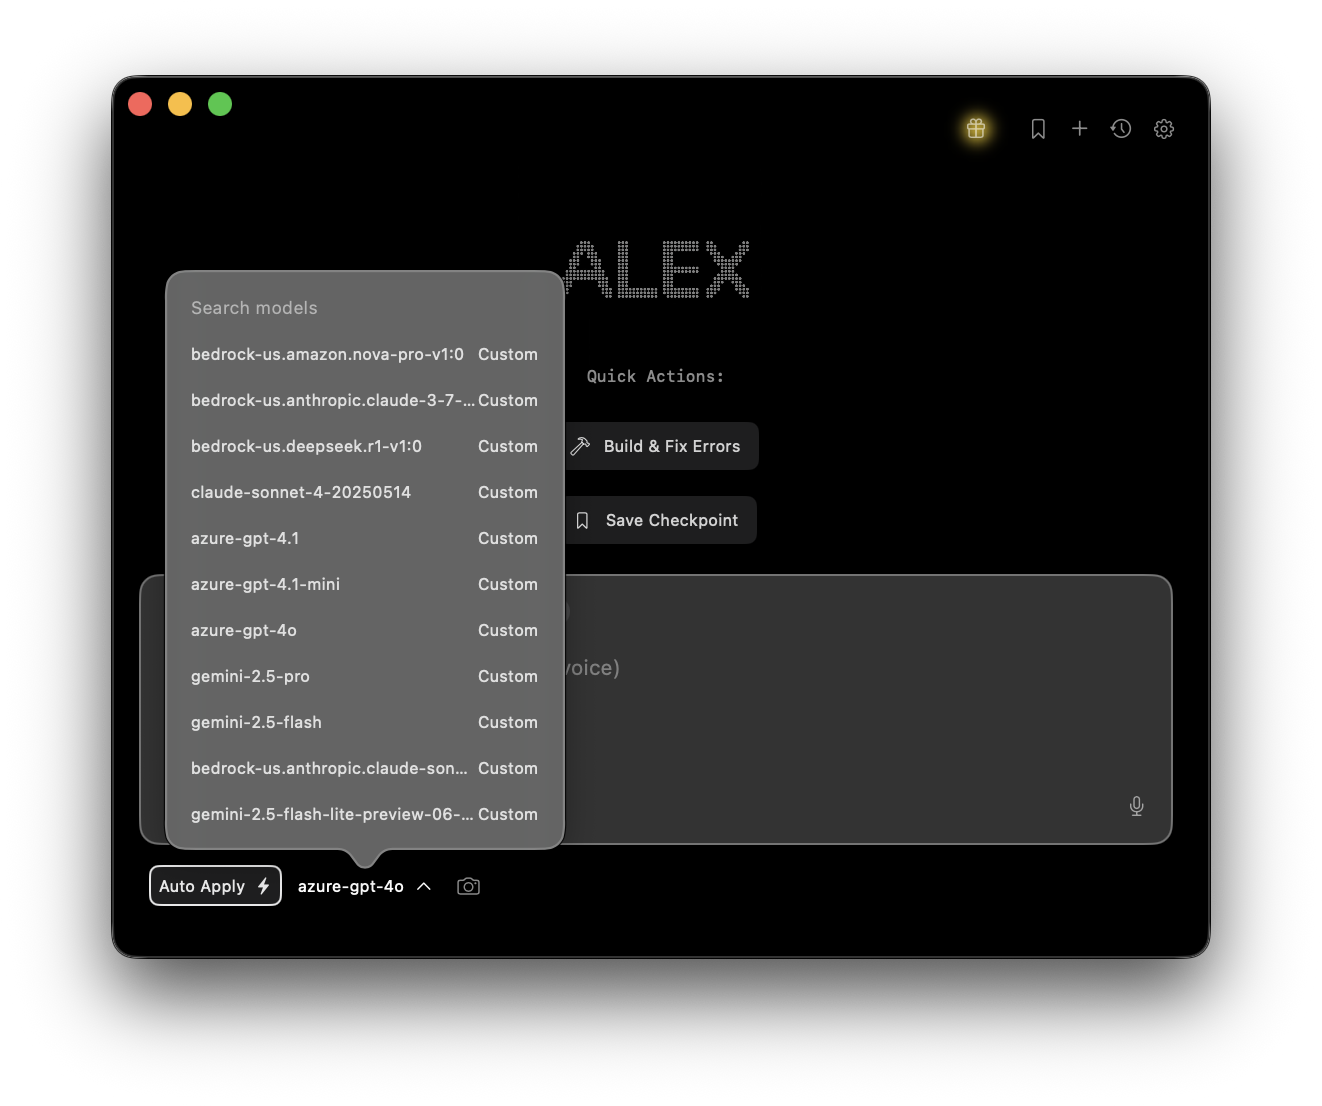 Team members can:
* Select from configured models using the model selector (bottom left of chat)
* See custom model names exactly as configured by admins
Changes to team models apply immediately to all members. Users may need to restart Alex Sidebar to see new models.
## Advanced Settings
Team members can:
* Select from configured models using the model selector (bottom left of chat)
* See custom model names exactly as configured by admins
Changes to team models apply immediately to all members. Users may need to restart Alex Sidebar to see new models.
## Advanced Settings
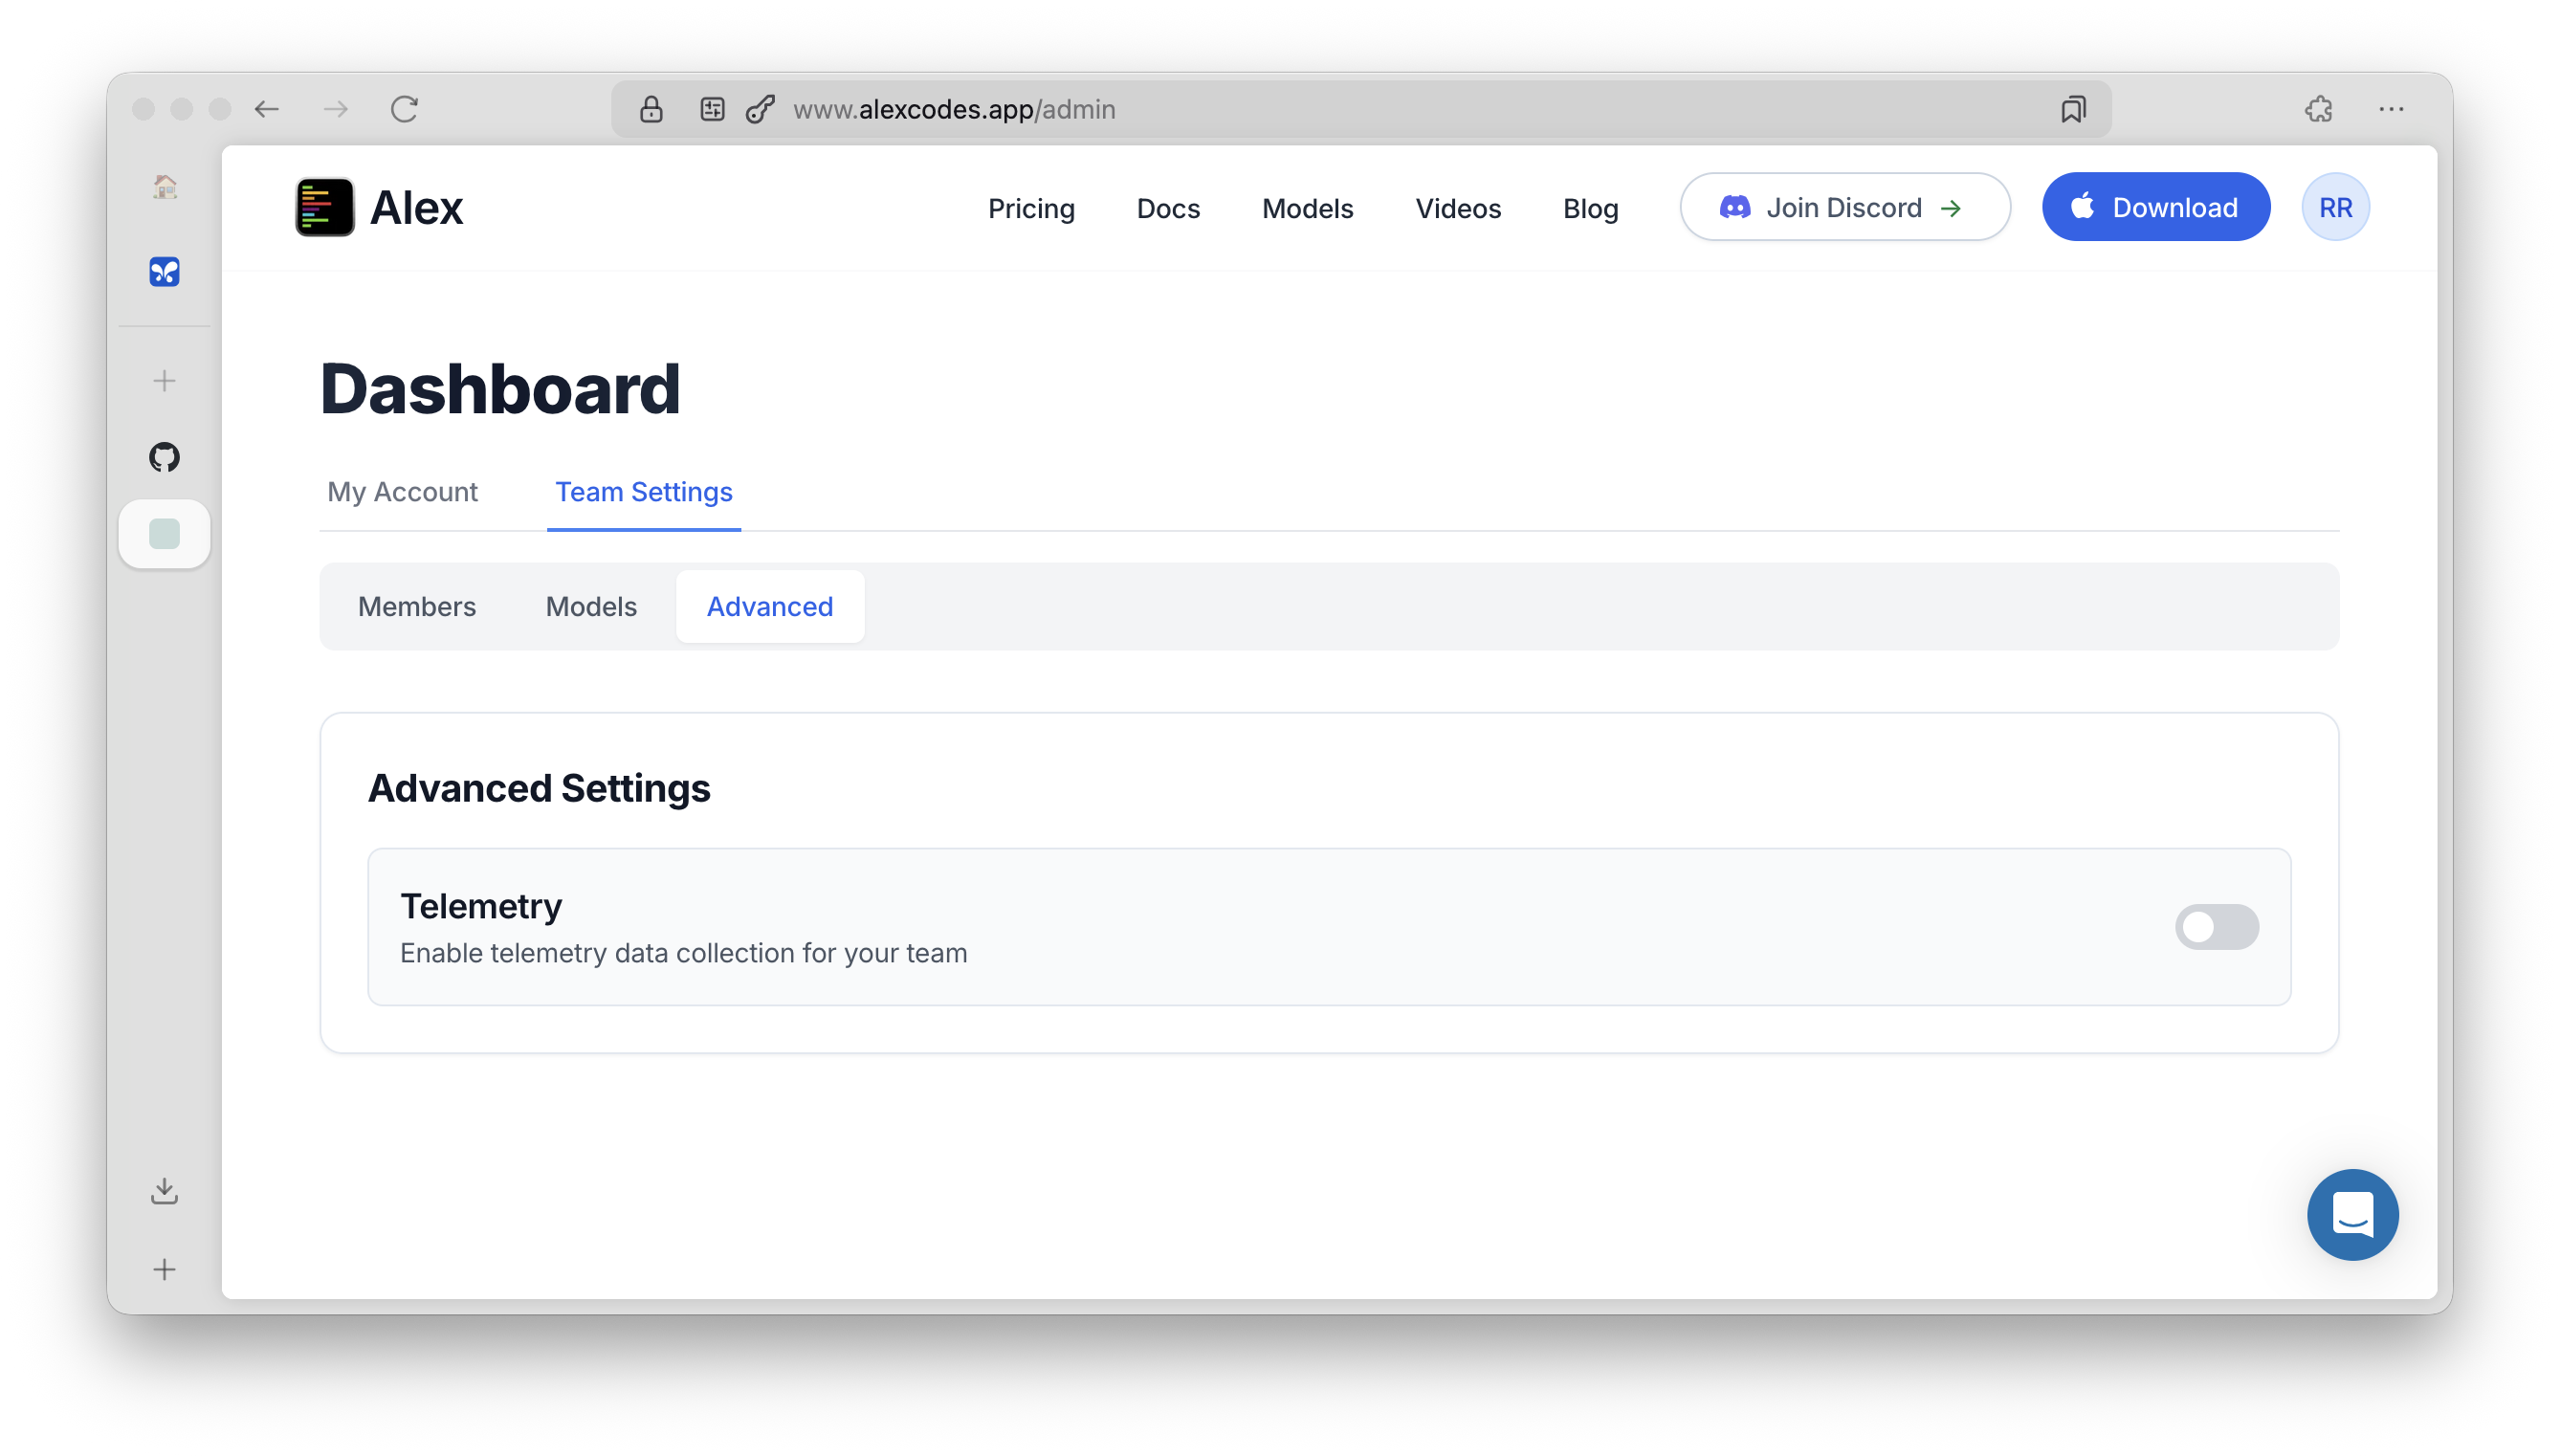 The **Advanced** tab contains telemetry settings:
### Telemetry
Toggle "Enable telemetry data collection for your team" to control:
* Analytics data collection
* Crash logs and error reporting
* Usage statistics
When disabled, no telemetry data is sent from any team member's Alex Sidebar.
## Best Practices
Configure chat models first as they're used most frequently
Name models clearly (e.g., `dev-claude`, `prod-gpt4`) so developers know which to use
Verify each model works correctly before adding team members
Create internal documentation explaining when to use each model
## Cost Management
When using team models:
* All API costs are billed to your organization's accounts
* Individual developers don't need personal API keys
* Monitor usage through your cloud provider's dashboard
* Set up billing alerts to track spending
## Troubleshooting
* Ensure you clicked "Save Changes" after configuring models
* Check members have synced their Alex Sidebar app
* Verify the model endpoints are accessible from user networks
* Verify API keys are correct and active
* Check Base URL includes `/v1` suffix for OpenAI-compatible endpoints
* Ensure API keys have necessary permissions
* Verify you have admin role in the team
* Check you're using the correct email address
* Contact [team@alexcodes.app](mailto:team@alexcodes.app) if you need admin access
## Integration with LiteLLM
For teams using LiteLLM proxy:
1. Deploy LiteLLM with your enterprise models
2. Add your LiteLLM endpoint as Base URL
3. All team members automatically use your proxy
4. No individual cloud accounts needed
See the [LiteLLM Setup Guide](/configuration/litellm-setup) for detailed instructions.
The **Advanced** tab contains telemetry settings:
### Telemetry
Toggle "Enable telemetry data collection for your team" to control:
* Analytics data collection
* Crash logs and error reporting
* Usage statistics
When disabled, no telemetry data is sent from any team member's Alex Sidebar.
## Best Practices
Configure chat models first as they're used most frequently
Name models clearly (e.g., `dev-claude`, `prod-gpt4`) so developers know which to use
Verify each model works correctly before adding team members
Create internal documentation explaining when to use each model
## Cost Management
When using team models:
* All API costs are billed to your organization's accounts
* Individual developers don't need personal API keys
* Monitor usage through your cloud provider's dashboard
* Set up billing alerts to track spending
## Troubleshooting
* Ensure you clicked "Save Changes" after configuring models
* Check members have synced their Alex Sidebar app
* Verify the model endpoints are accessible from user networks
* Verify API keys are correct and active
* Check Base URL includes `/v1` suffix for OpenAI-compatible endpoints
* Ensure API keys have necessary permissions
* Verify you have admin role in the team
* Check you're using the correct email address
* Contact [team@alexcodes.app](mailto:team@alexcodes.app) if you need admin access
## Integration with LiteLLM
For teams using LiteLLM proxy:
1. Deploy LiteLLM with your enterprise models
2. Add your LiteLLM endpoint as Base URL
3. All team members automatically use your proxy
4. No individual cloud accounts needed
See the [LiteLLM Setup Guide](/configuration/litellm-setup) for detailed instructions.